Developing Software for Embedded Linux
Linux on embedded systems, or "Embedded Linux" is the field of running an operating system based on the Linux kernel on a specialized device, like a coffee maker, or internet router, that have limited computational resources, like CPU speed or memory.
"Developing for embedded Linux" really just means the act of writing software, in some way, that will end up on a specialized computer system running Linux.
The process of developing software on a PC, for instance, usually involves editing, running, and distributing the code for a project all on the same operating system, and sometimes even similar models of computers. With embedded Linux, the computer running the code can be tens of times less powerful than the development machine.
Who this Guide is For, What You'll Need
This guide is meant for anyone wanting to develop software for common Linux single board computers, such as the Raspberry Pi family, Jetson Nanos, Orange Pis, Latte Pandas, or any other board running a Linux-based OS.
This guide includes practical instructions that will require one of these boards to complete. You will also need a way to connect the board to a network. This can be wirelessly through WiFi, through an Ethernet connector, or a USB-to-Ethernet adapter. This guide will go over how to use these tools to connect your SBC.
Don't Develop Directly on Your Embedded Linux System
Typically, when creating software for an embedded Linux system, the developer does not use the target Linux computer to develop the software. For example, if a developer purchases a Raspberry Pi Zero to develop a kiosk for a restaurant, they do not hook up a monitor/keyboard/network to the zero and open files and edit text on the Pi itself, but use another computer to write all of the source code and then upload the files over a network to the Pi, where they will be compiled and/or ran.
This is done for a couple reasons, some necessary, some for developer experience. Usually the devices that embedded software is developed for are far less powerful than a personal computer, or other machine engineers use for development. Developing on another, more powerful computer gives developers access to Integrated Development Environments (IDEs), advanced debugging tools, and other tools provided by a general-purpose OS.
Some embedded systems may not even have the computational resources to develop applications. Development kits and tools for software are typically far more technically expensive than running applications. For instance, a Raspberry Pi Zero only has 512MB of RAM, and warns users when opening Chromium that the application may not even function on the system. Running an IDE, training an AI model, or performing just a web search can be enough to overheat or deadlock the OS.
When it's impossible to develop on a Raspberry Pi, or other SBC, engineers must find a way to develop software without bogging down the target system. Developers use tools like cross-compiliation, network file transferring, and virtualization to develop off of a target system.
Cross-compilation and virtualization, while very useful tools for remotely developing software, are going to be out-of-scope for this guide. The next sections will focus more on transferring files over the network between the development and target machine. Performing these network transfers, and running the developed software on the Linux system provides practice on command-line interfaces as well.
Note that languages like Python or Java, and a lot of web languages like Node.js or Typescript, do not need to be compiled, so the developer just needs to transfer the files and run them with python.
Connecting to Linux Machines Remotely
Most PCs that individuals interract with on a daily basis have a screen, mouse, keyboard, or other human input devices (HIDs) that can take input from a user, display a picture, and perform tasks based off of this input. HID can also take the form of an available HDMI port, USB connectors, or other connectivity interface.
Embedded systems, however, do not typically have the same wide range of HID. Raspberry Pi 3/4/5 SBCs have support for keyboad and a display, allowing users to interface with them like a desktop computer. Linux boards like the Beagle Bone series, and some other Raspberry Pi Boards (CM, Zero) do not have the same connectivity options.
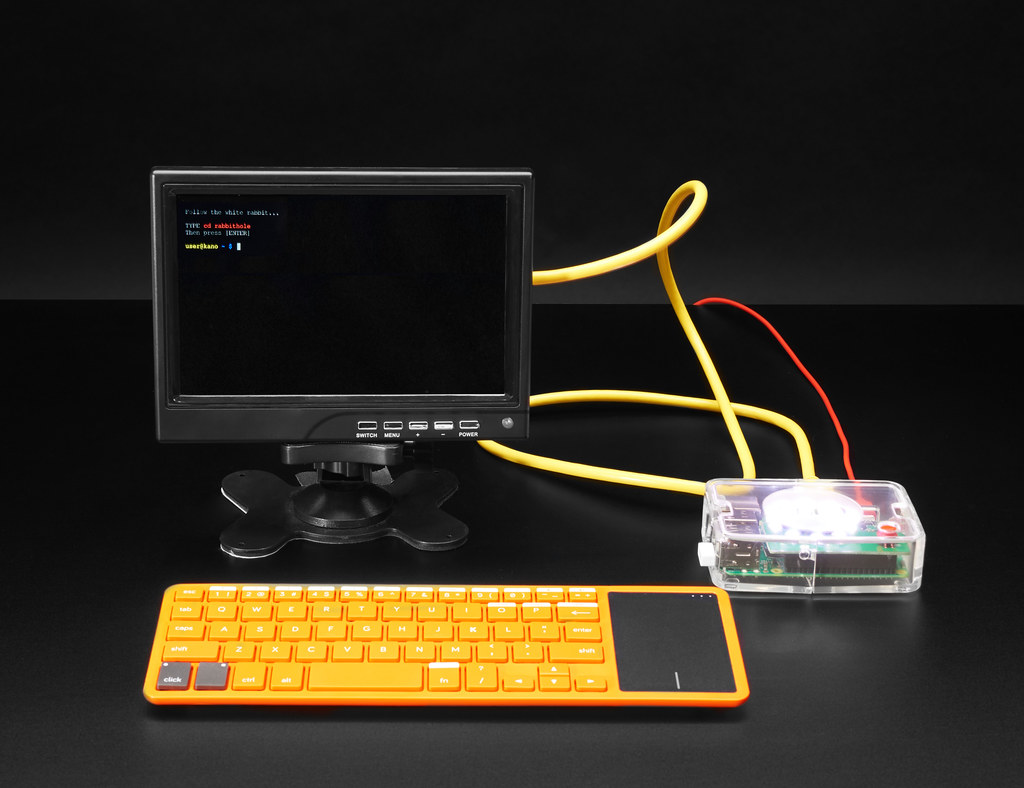
Image Credit: https://www.flickr.com/photos/adafruit/40668185892
So, when you are presented with a Linux-based board with no HDMI port for a display, USB port for a keyboard, or other common interfaces, how can these boards be interracted with?
Typically, all Linux SBCs, or even production boards, will expose an Ethernet port, or serial interface to connect to the board. Ethernet is for connecting the board to an IP network, and the serial port is for directly connecting to the board without any network or other attached hardware.
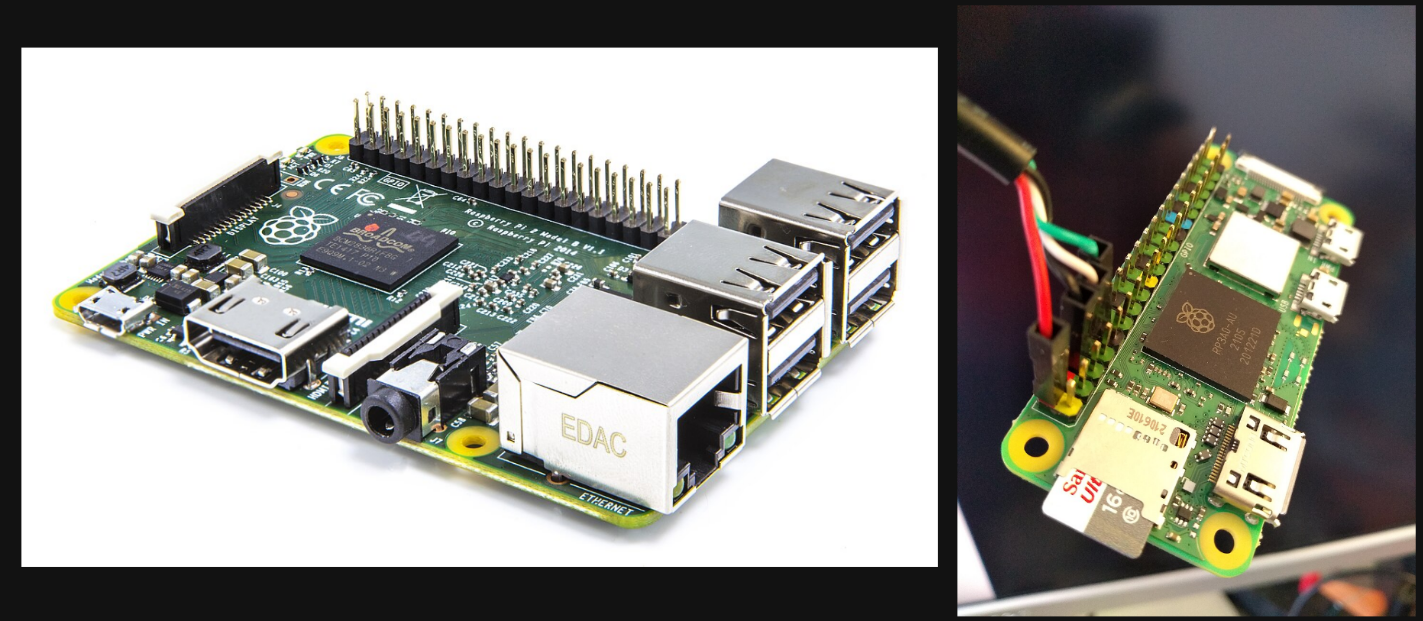
Image Credit: https://commons.wikimedia.org/wiki/File:RPi-0-2-WHC.jpg, https://commons.wikimedia.org/wiki/File:Raspberry_PI.jpeg
For devices with an Ethernet port, or even WiFi, the recommended solution would
be to connect the device to a network and use ssh to access the device. For
devices without network connectivity (or at least network interfaces that are
inconvenient to access) boards can be accessed through serial, using either a special
cable with a USB-to-serial converter built in, or a dedicated USB-to-serial board.
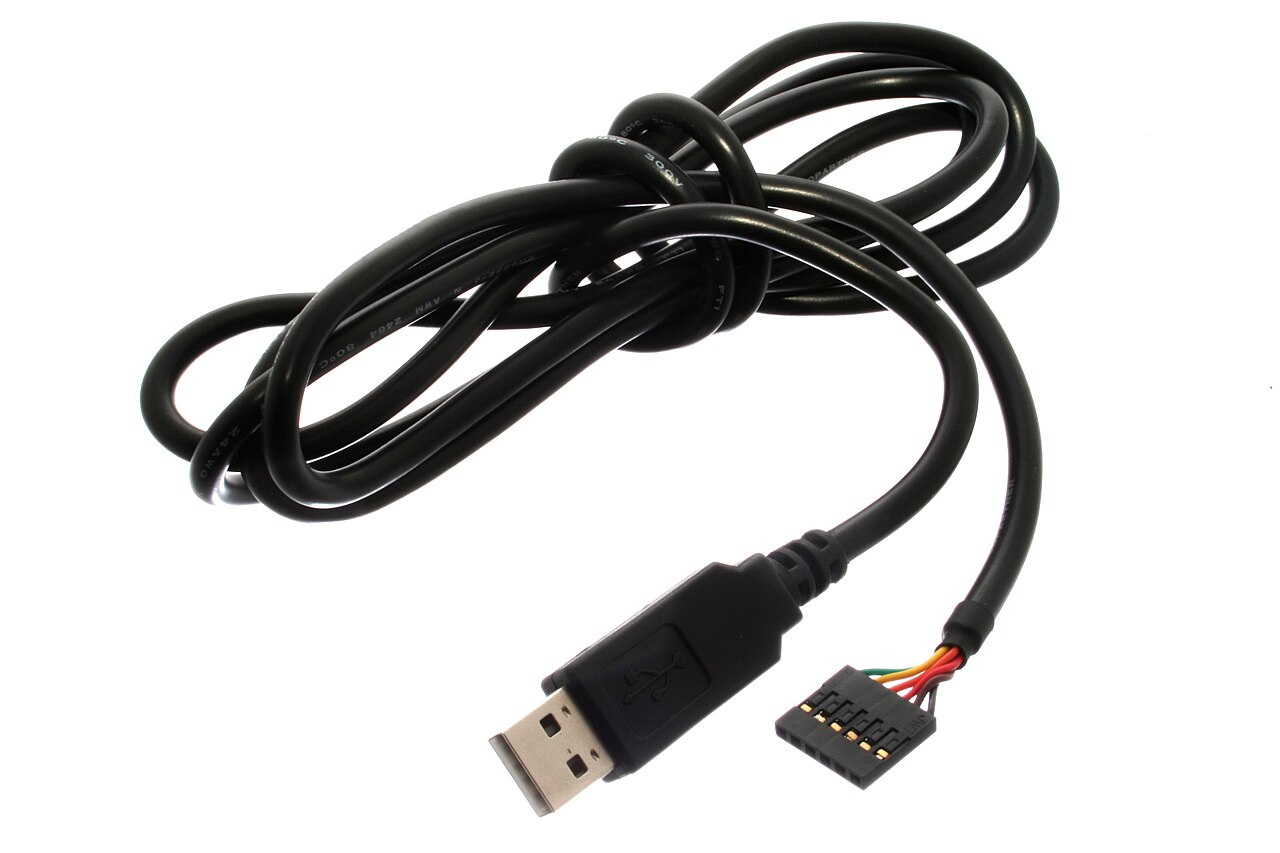
Image Credit: https://commons.wikimedia.org/wiki/File:FTDI_Cable.jpg
ssh is a very common tool. SSH stands for "Secure Shell", which provides computers
a way to send commands to each-other over an IP network. The term "shell" comes from
a program located on the computer which is being connected to, called a shell. The
shell is the most basic
program used for user-interface to a computer's operating system. It is usually
text-based and requires the user to input commands, and then the shell
gives feedback from the OS.
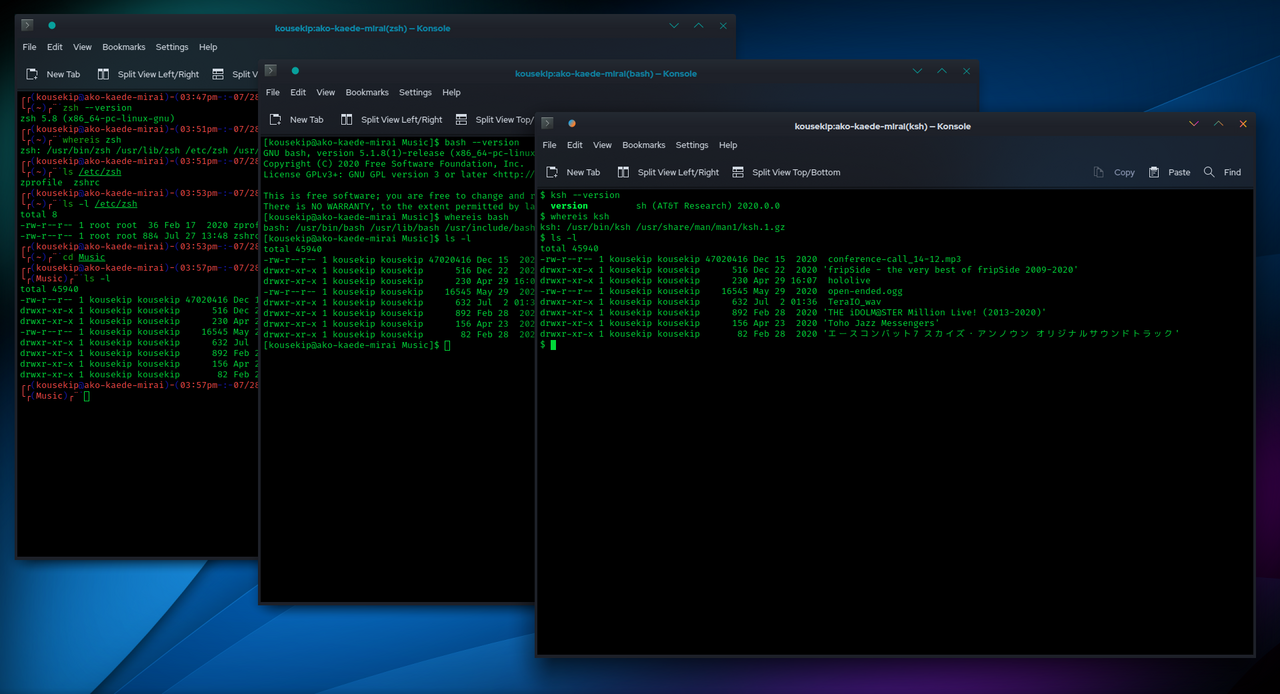
Image Credit: https://commons.wikimedia.org/wiki/File:Unix_shells_in_Konsole_screenshot.png
If you're on Windows, use a program like PuTTY,
MobaXTerm, or ssh natively on the
"Windows Terminal" program to connect to a Linux SBC connected to your network.
If you plan to connect via serial, look up your individual board's documentation on how to do so, and use PuTTY or MobaXTerm to connect to the device.
If you're on Linux, you probably know what you're doing :)
Ethernet/WiFi
SBCs like the Raspberry Pi have Ethernet connectors and WiFi chips that you can use
to connect them to IP networks. This can be your home wifi, or just your PC/Laptop.
This connection gives the Pi access to an IP network where other devices can use
tools like ssh, or remote desktop to access the Pi over the network.
Serial
One of the most reliable forms of connectivity on Linux SBCs is the serial port. "Serial Ports" are data links, similar to ethernet, that send data one bit after the other. Generally, Linux boards will typically have TX and RX pins which are connected to a special cable or module that gives the user access to a terminal that is sent over this link. Note that some boards need to have this feature enabled before it will work.
Why Use the Command Line Interface
Introductory users of Raspberry Pis, or other "hobby-grade" Linux SBCs are typically encouraged by both the manufacturer and online resources to interract with mostly GUI components to develop software, at least for beginners. The power of embedded Linux comes almost entirely from the command line interface (CLI).
As discussed in the previous session, developers are not always given the ability
to provide input to a computer in the normal way of mouse and keyboard, so they
have to use utilities like ssh and the serial interface. Both of these interfaces
do not offer any graphical user interface (GUI), and require users to be capable
of using the CLI in order to interract with the system. In fact, many production
Linux servers and embedded devices are "headless", meaning they do not provide
a GUI and just a CLI.
Naturally, some GUI tools provide a better interface than the command-line can, especially for learning. This guide will cover some of those more graphical tools for transferring files.
How we Recommend to Develop Software for a Remote Target
This guide mostly targets developers running Windows, as those running various Linux distros most likely already know what they are doing. For Windows, we recommend a set of software that will make it easy to transfer source files from a development machine to an embedded system.
For most situations, we recommend setting up a network connection between the
development machine and the embedded computer, usually using an Ethernet cable
via a built-in port, or adapter. Once connected, you can use ssh to connect
to the Pi using the IP address, username, and password.
For transferring files, we recommend the use of WinSCP which will use the same network connection to transfer files between machines.
For instructions on installing and configuring WinSCP, see the official WinSCP Setup Guides.
Advanced users can utilize a program like rsync to sync files between two linux PCs.
For instance, if you have a Python project, you would use your laptop or PC to write and run python code, then use a tool like WinSCP to copy the files over to your embedded device.
After copying the files over, use ssh to log into a Pi and run your code,
and install dependencies.
Enabling SSH on Raspberry Pi
Before you can connect to a Raspberry Pi via SSH, you need to ensure SSH is enabled. By default, SSH is disabled on Raspberry Pi OS for security reasons.
Method 1: Using Raspberry Pi Imager (Recommended)
When flashing your SD card using Raspberry Pi Imager,
click the gear icon (⚙️) or press Ctrl+Shift+X to open the advanced options menu.
From here you can:
- Enable SSH
- Set a username and password
- Configure WiFi settings
- Set the hostname
This is the easiest method as it configures everything before the first boot.
Method 2: Using raspi-config
If you have access to the Pi with a monitor and keyboard:
- Open a terminal
- Run
sudo raspi-config - Navigate to Interface Options → SSH
- Select Yes to enable SSH
- Reboot the Pi
Method 3: Creating an SSH File on the Boot Partition
If you don't have a monitor but have access to the SD card:
- Insert the SD card into your computer
- Open the
bootpartition (it should appear as a drive) - Create an empty file named
ssh(no extension) in the root of the boot partition - Safely eject the SD card and insert it into your Pi
- SSH will be enabled on the next boot
Older Raspberry Pi OS images used the default username pi with password raspberry.
Newer images (April 2022 onwards) require you to set a username and password during
setup using the Raspberry Pi Imager or on first boot with a monitor attached.
Board-Specific Guides
The following guides will talk about how to connect to different common boards, using some of the methods described above.
Connecting to a Raspberry Pi 3/4/5 (SSH, recommended)
These series of Raspberry Pis all have a Ethernet connector located on the board. This connector can be used to set up a network connection to each board. Power on the board, and connect an Ethernet cable from the board to your development machine.
Note that you will need to figure out the IP address of the Pi. You can use a couple of different methods for this:
- Hook the board up to a monitor, and use the
ip acommand to find the IP address for the ethernet interface (usually namedeth0) after connecting it to your pc. Write this IP address down, and continue copying/ssh'ing as long as you don't unplug the network connection or power down the board. You will need to do this every time you power on the board. - Configure a static IP address on the board by editing the configuration. You will have to google how to do this for your operating system (Raspian/Ubuntu/Debian).
- Use an IP scanner like AngryIP Scanner to find an attached RPi.
Remember that you will also have to configure your development machine if you use a static IP address.
For the sake of argument, let's assume the IP address of your Raspberry Pi was
discovered to be 192.168.56.22 and has an account with user user and password
pass.
Let's say you have the following python file that you want to transfer to the machine:
# main.py
print("Hello, world!")
Firstly, it's a good idea to use the ping command to make sure the IP address
is right.
ping 192.168.56.22
Should respond with something similar to this if the board is alive, and the IP is correct:
PING 192.168.56.22 (192.168.56.22) 56(84) bytes of data.
64 bytes from 192.168.56.22: icmp_seq=1 ttl=113 time=7.73 ms
64 bytes from 192.168.56.22: icmp_seq=2 ttl=113 time=13.1 ms
64 bytes from 192.168.56.22: icmp_seq=3 ttl=113 time=8.04 ms
Note that the output may be different on Windows, this was taken from a Linux system.
Then, connect to the machine to the internet.
For some of the following actions, specifically those using apt, you will need
an internet connection. For Pis, the easiest thing to do is use the desktop with
a monitor and keyboard to connect to something like BuGuest, or an iPad hotspot.
If you cannot do either of these things, google "Connect Raspberry Pi for the Internet" and you should get some guides.
Then, you can ssh into the Pi and run a command to get python. To ssh into the Pi:
To enter these commands, use the Terminal application on Windows 11 or MAC
ssh user@192.168.56.22
and when it prompts for the password, enter it. It will not show what you are typing, this is on purpose. This will then give you a shell where you can enter commands to control the embedded computer, similar to a desktop environment like Windows.
Then, use the following command to install python:
sudo apt install python3
Then exit from the ssh session using the command exit.
You can now use WinSCP to transfer files by entering in the same username and password and exploring the files on your development machine and the embedded system. To upload files, simply drag and drop the python file from it's spot on your computer to the remote machine. After this, ssh back into the embedded system like you did before, and then navigate to where you stored the python file.
Use the commands pwd, cd, and ls to figure out where you are in the file system
of the target machine. Most likely, the file will end up at the path:
/home/user
Where "user" is the name of the user you are logged into. Once you've found the python file, just pass it's name to the python command:
python3 main.py
And you should get the output:
Hello, world!
Raspberry Pi 4 Development Guide
To better illustrate all of these concepts, we'll go through a full tutorial on how to go about developing a simple python web server, then transfer it to a Raspberry Pi, to run there.
To avoid confusion, each command snippet provided that you would enter into a terminal will be marked with a comment specifying if the command is to be run on the development machine shell, or the Pi's shell. This comment will look like this for the development machine:
# DEV
echo "Hello, Development Machine!"
And this for the Raspberry Pi:
# PI
echo "Hello, Raspberry Pi!"
Writing our Software
We'll start on our development machine. Open up your favorite text editor, and "write" (copy/paste) the following python code:
# A super simple python file that we'll run on our embedded computer!
def main():
    print("Embedded linux is fun!")

if __name__ == "__main__":
    main()
Then, run the file from the terminal (you can do this from the terminal app, or from VsCode's terminal, as long as python is installed). You can also use the "run" button in VsCode.
(If you are using the terminal, make sure you are in the same directory as the
main.py file)
# DEV
python main.py
you should get the output:
Embedded linux is fun!
After you have validated the output of the program, save it to your computer somewhere safe. We'll need it later to transfer to the Pi.
Getting our Softare on the Pi
So now we're all done developing our super complicated and awesome python application! Now, we are faced with the problem of getting it running on our embedded computer. For this, we will hook up a Pi to a monitor using a mouse and keyboard, to be able to check it's IP address.

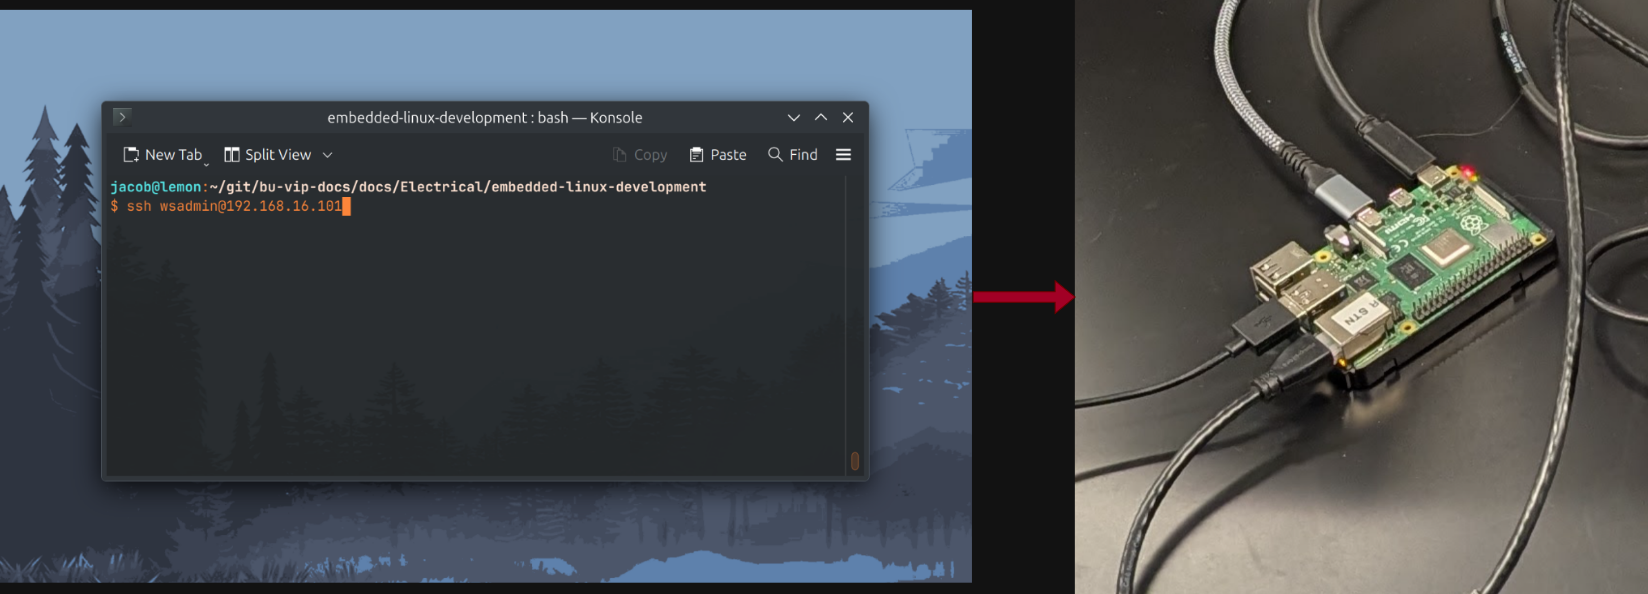
For my setup, I found that the Pi had an IP address of 192.168.16.101 by using
the ip a command. Knowing that, I set my laptop's IP address to 192.168.16.100,
you will need to find out how to do this for your operating system. It's also possible
if you're on Windows, the Pi got it's IP from Windows, and you will be on the same
network as the Pi.
After confirming the IP, I validated that I could ping the Pi by using the ping command:
# DEV
ping 192.168.16.101
I'm skipping over getting the Pi connected to the internet, but in the case your Pi's OS didn't come with Python pre-installed, you will need to run:
sudo apt install python on the Pi's shell.
In order to run the software on the Pi. In this situation, I would run the Pi with a monitor and keyboard, and turn on the WiFi through the desktop.
Which returned a good ping, so I knew I could connect to the Pi.
From here, you can use your favorite tool to transfer the file. WinSCP is a good
choice for Windows users, and is super intuitive. For me, I'm on Linux so I will
use the rsync command. I'll just copy the main.py file directly to the home
directory of the user I'm working with. Let's say that the user on the Pi is user.
# DEV
rsync ./main.py user@192.168.16.101:/home/user/
Accept the key, and type the password when prompted.
This will copy the main.py file to the user on your Pi. From here, you should be
able to use ssh to get a remote shell on the Pi.
# DEV
ssh user@192.168.16.101
Type the password when prompted. Press enter, and you should now have a shell on the Pi.
# PI
python3 main.py
And you should get the output:
Embedded linux is fun!
Troubleshooting
Here are solutions to common issues you may encounter when connecting to your Raspberry Pi or other embedded Linux device.
Ping Fails or "No route to host"
- Check the physical connection: Ensure the Ethernet cable is securely connected to both your computer and the Pi. Try a different cable if available.
- Verify IP addresses are on the same subnet: If your Pi is
192.168.1.100, your computer should be something like192.168.1.x(not192.168.0.x). - Wait for the Pi to boot: The Pi may take 30-60 seconds to fully boot and obtain an IP address.
- Check if the Pi is powered on: Ensure the power LED is lit on the Pi.
SSH "Connection refused"
This usually means SSH is not enabled on the Pi.
- See the Enabling SSH on Raspberry Pi section above to enable SSH.
- If SSH was previously working, the Pi may still be booting. Wait and try again.
SSH "Permission denied"
- Wrong username or password: Double-check your credentials. Remember that passwords are case-sensitive.
- Default credentials changed: Newer Raspberry Pi OS versions require you to
set credentials during setup. The old defaults (
pi/raspberry) may not work. - Typing password: Remember that the password won't display as you type—this is normal security behavior.
Can't Find the Pi's IP Address
If you don't have access to a monitor, try these alternatives:
- Check your router's admin page: Most routers list connected devices and their IP addresses. Look for a device named "raspberrypi" or similar.
- Use
arp -acommand: After attempting to ping the Pi (even if it fails), runarp -aon your computer to see recently discovered devices. - Use a network scanner: Tools like Angry IP Scanner
or
nmapcan scan your network for connected devices. - Connect the Pi to a monitor temporarily: Use
ip aorhostname -Ito find the IP address.
SSH Connection Hangs or Times Out
- Firewall issues: Check if a firewall on your computer is blocking outgoing SSH connections (port 22).
- Wrong IP address: Verify you're using the correct IP. The Pi's IP may have changed if using DHCP.
- Network configuration: If using a direct Ethernet connection (no router), ensure both devices have static IPs configured on the same subnet.
External Links & Resources
Youtube video on: SSH, rsync, setting up a headless Pi, showing network interfaces
By: Jacob Simeone - 2026-01-21, with assistance from Calude Code Opus 4.5